Cho Chikun loses Honinbo title
After holding the Honinbo title for a record 10 consecutive terms, Cho Chikun finally went down in defeat at the hands of 29-year-old Cho Sonjin. The new champion was a dark horse from the beginning in the league that determines the challenger for the title. His career up to now has not been particularly illustrious, although he has won three titles reserved for younger players. Most observers predicted that he would be lucky to win even one game against Cho Chikun. But after splitting the first four games of the best-of-seven match, Cho Sonjin got the measure of the former Honinbo and won the next two games and the title by a score of 4-2.
 In the crucial sixth game, Cho Chikun was in overtime: he had used up his allotted eight hours and had to make each of his moves within one minute. This situation is normal for Cho in two-day games. He was clearly winning, but the pressure of time and the realization that he would lose the title if he did not win this game probably caused him to make an uncharacteristic blunder.
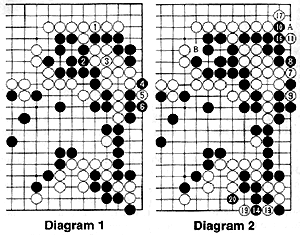
The final position is shown in Figure 1. A capturing race had developed between the marked black and white stones in the upper right. Cho Chikun (white) could have easily started a ko to capture the six marked black stones, but he descended to White 1. When Black also descended to 2, it was clear that the white stones would die, so Cho Chikun resigned.

|
|
12, 18: played 7; 15, 21: at9
|
In spite of this loss, Cho Chikun still holds the top two Japanese titles--the Kisei and the Meijin--so by anybody's reckoning he is still number one in Japan. Therefore, he could still be upbeat about this result. He promised to be back next year as the challenger and repeat his feat of holding the Honinbo title for 10 straight terms.
Answers to last week's problem
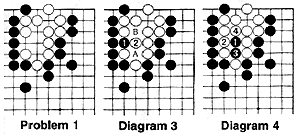
 In Problem 1, White has an eye on the second line at the top, so if Black is going to kill the white stones, he has to destroy the white's eye shape below. Black 1 in Diagram 3 fails to accomplish this because White will answer with 2. Although Black has created a false eye at A, White gets his second eye at B, so his stones are alive.
White 2 in Diagram 3 is clearly the key point because if White can play there he gets two eyes. Therefore, Black must play on 1 himself as in Diagram 4. White plays 2 to stop Black 1 from linking up to his stones on the outside, but Black now plays 3, putting a white stone in atari. White will capture with 4, but Black throws in a stone at 5 in Diagram 5. White can capture this stone, but that point is a false eye. White will eventually have to play there, so he is left with only one eye and his stones are dead.
 
|
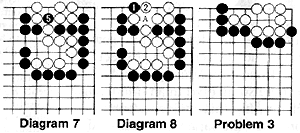
You might think that Black 1 in Diagram 8 would force White to connect at A, then Black can play 2 destroying the eye at the top. However, White will answer Black 1with 2. White can now fight a ko. If he is able to win the ko by connecting at A, he will have his second eye to the right of 2. Clearly, it would be better to kill white cleanly by playing the sequence in Diagrams 6 and 7.
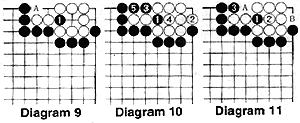
 In the position in Problem 3, the only move that will kill the white stones is for Black to throw in a stone at 1 in Diagram 9. White cannot play at A because he puts his stones into atari. Therefore, he makes an eye in the corner with 2 in Diagram 10. Next, Black ataris with 3 and 5, and the eye at 1 is now a false one, so White is dead.
If White captures Black 1 with 2 in Diagram 11, Black will play 3. If White next plays A, Black will play B, leaving the white stones with only one eye (at 1). If White B, Black plays A and the eye at 1 is a false one. Either way, White's stones are dead.
